


GIMP tutorial: Striped background

This tutorial will show you how to create quickly some stripes to add to an image (for example, the image on the right here with some thin diagonal stripes)
Most tutorials depends on the use of a pattern with stripes, but here we will use gradients.
The gradient method allows to create quickly stripes of any size and any angle.
The drawback is that, even if you could use this for an illustration, it won't work as a tileable pattern (for a webpage for example). If you don't plan to do a webpage, it's ok ;)
Let's start with a quick example:
1) Create a new image (the size doesn't really matter, choose 800*600px or whatever you like, it's just an example).
2) Select any gradient you wish (even the default FG to BG).
3) Select the gradient tool. In the tool options, set "Repeat" to "Sawtooth" like show here:

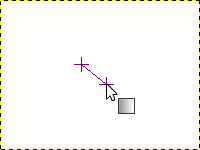
4) Now use the gradient tool to draw a short gradient on your image, like shown below. The angle of the "stroke" will give the angle of the stripes (x90°) and the lenght of the stroke will give the width of the stripes.
5) On the left image, you can see that there's some ugly pixelation effect. Thick the "Adaptative supersampling" box in the tool options, and then you should have a much smoother result, as shown on the right image:


Anyway, that still not very nice looking, right? But these are some stripes, at least :p. We just have to use a better gradient to create something like this for example: (please forgive the ugly jpeg artifacts - it looks like this blog host likes to re-save images with an awful compression :/ )

6) Now you can either download this set of ready-to-use gradients stripes_gradients.zip (uncompress it and put the .ggr files inside your ~/.gimp-2.*/gradients/ directory ) or create your own gradients (read below, 7 ).
The gradients from the set use the Foreground and Background colors, so no need to edit them to change the colors (but you can edit them to change the width of some stripes). Here are some small examples with various FG/BG colors (and also different "shape" settings: linear, radial and spiral) (yarrrgh, the ugly compression strikes again)

7) To create your own gradients to make stripes, you may want to look at this page : http://manual.gimp.org/en/gimp-gradient-dialog.html.
An example setup:
Use the "Make new gradient" button on the bottom of the gradient list dialog(Ctrl+G), it will open the gradient editor. The default gradient is a black to white one.
Right click on it and choose "Split segment at Midpoint".
Then click on the left part of the bottom bar (where there's the triangles) so the left segment is selected. Right-click and select "Left Color Type > Foreground Color". Do the same for the "Right Color Type".
Then select the right segment (click on the right of the bottom bar), and do the same for the Left and Right Color Type, but with Background Color, this time.
You can then move the bottom triangles to change the width of the left and right segments.
Now you have a simple 2-colors gradient that can be tweaked to get various effects. For the image at the top of the tutorial, I just added some black and whites stripes on a new layer, and set it to "overlay", so the colorful base image was visible.


/http%3A%2F%2Fstorage.canalblog.com%2F51%2F39%2F574603%2F44002434_o.png)
/http%3A%2F%2Fstorage.canalblog.com%2F61%2F65%2F574603%2F36143959_o.png)
/http%3A%2F%2Fstorage.canalblog.com%2F03%2F76%2F574603%2F36137325.png)